
How to send multiple freebies using just one list in MailChimp for free

UPDATE: Using Groups & a Free WordPress Plugin called Easy Forms
Mailchimp has updated its platform several times since this original post. Here is a quick review of how to do this today, the simplest way I know in 2022.
SUMMARY:
1) Create a GROUP-CATEGORY
2) Create a CATEGORY within your “GROUP-CATEGORY” and name it “download”
3) If you use WordPress use the free plugin called Easy Forms to add the code to your site. If you use Squarespace or WIX I recommend that you use Mailchimp’s landing pages for best results.
Here are the UPDATED details for how to add multiple freebies using Mailchimp and just one list
Click through the screenshots below to help you with the steps.


What you have to do in Mailchimp to create multiple freebies
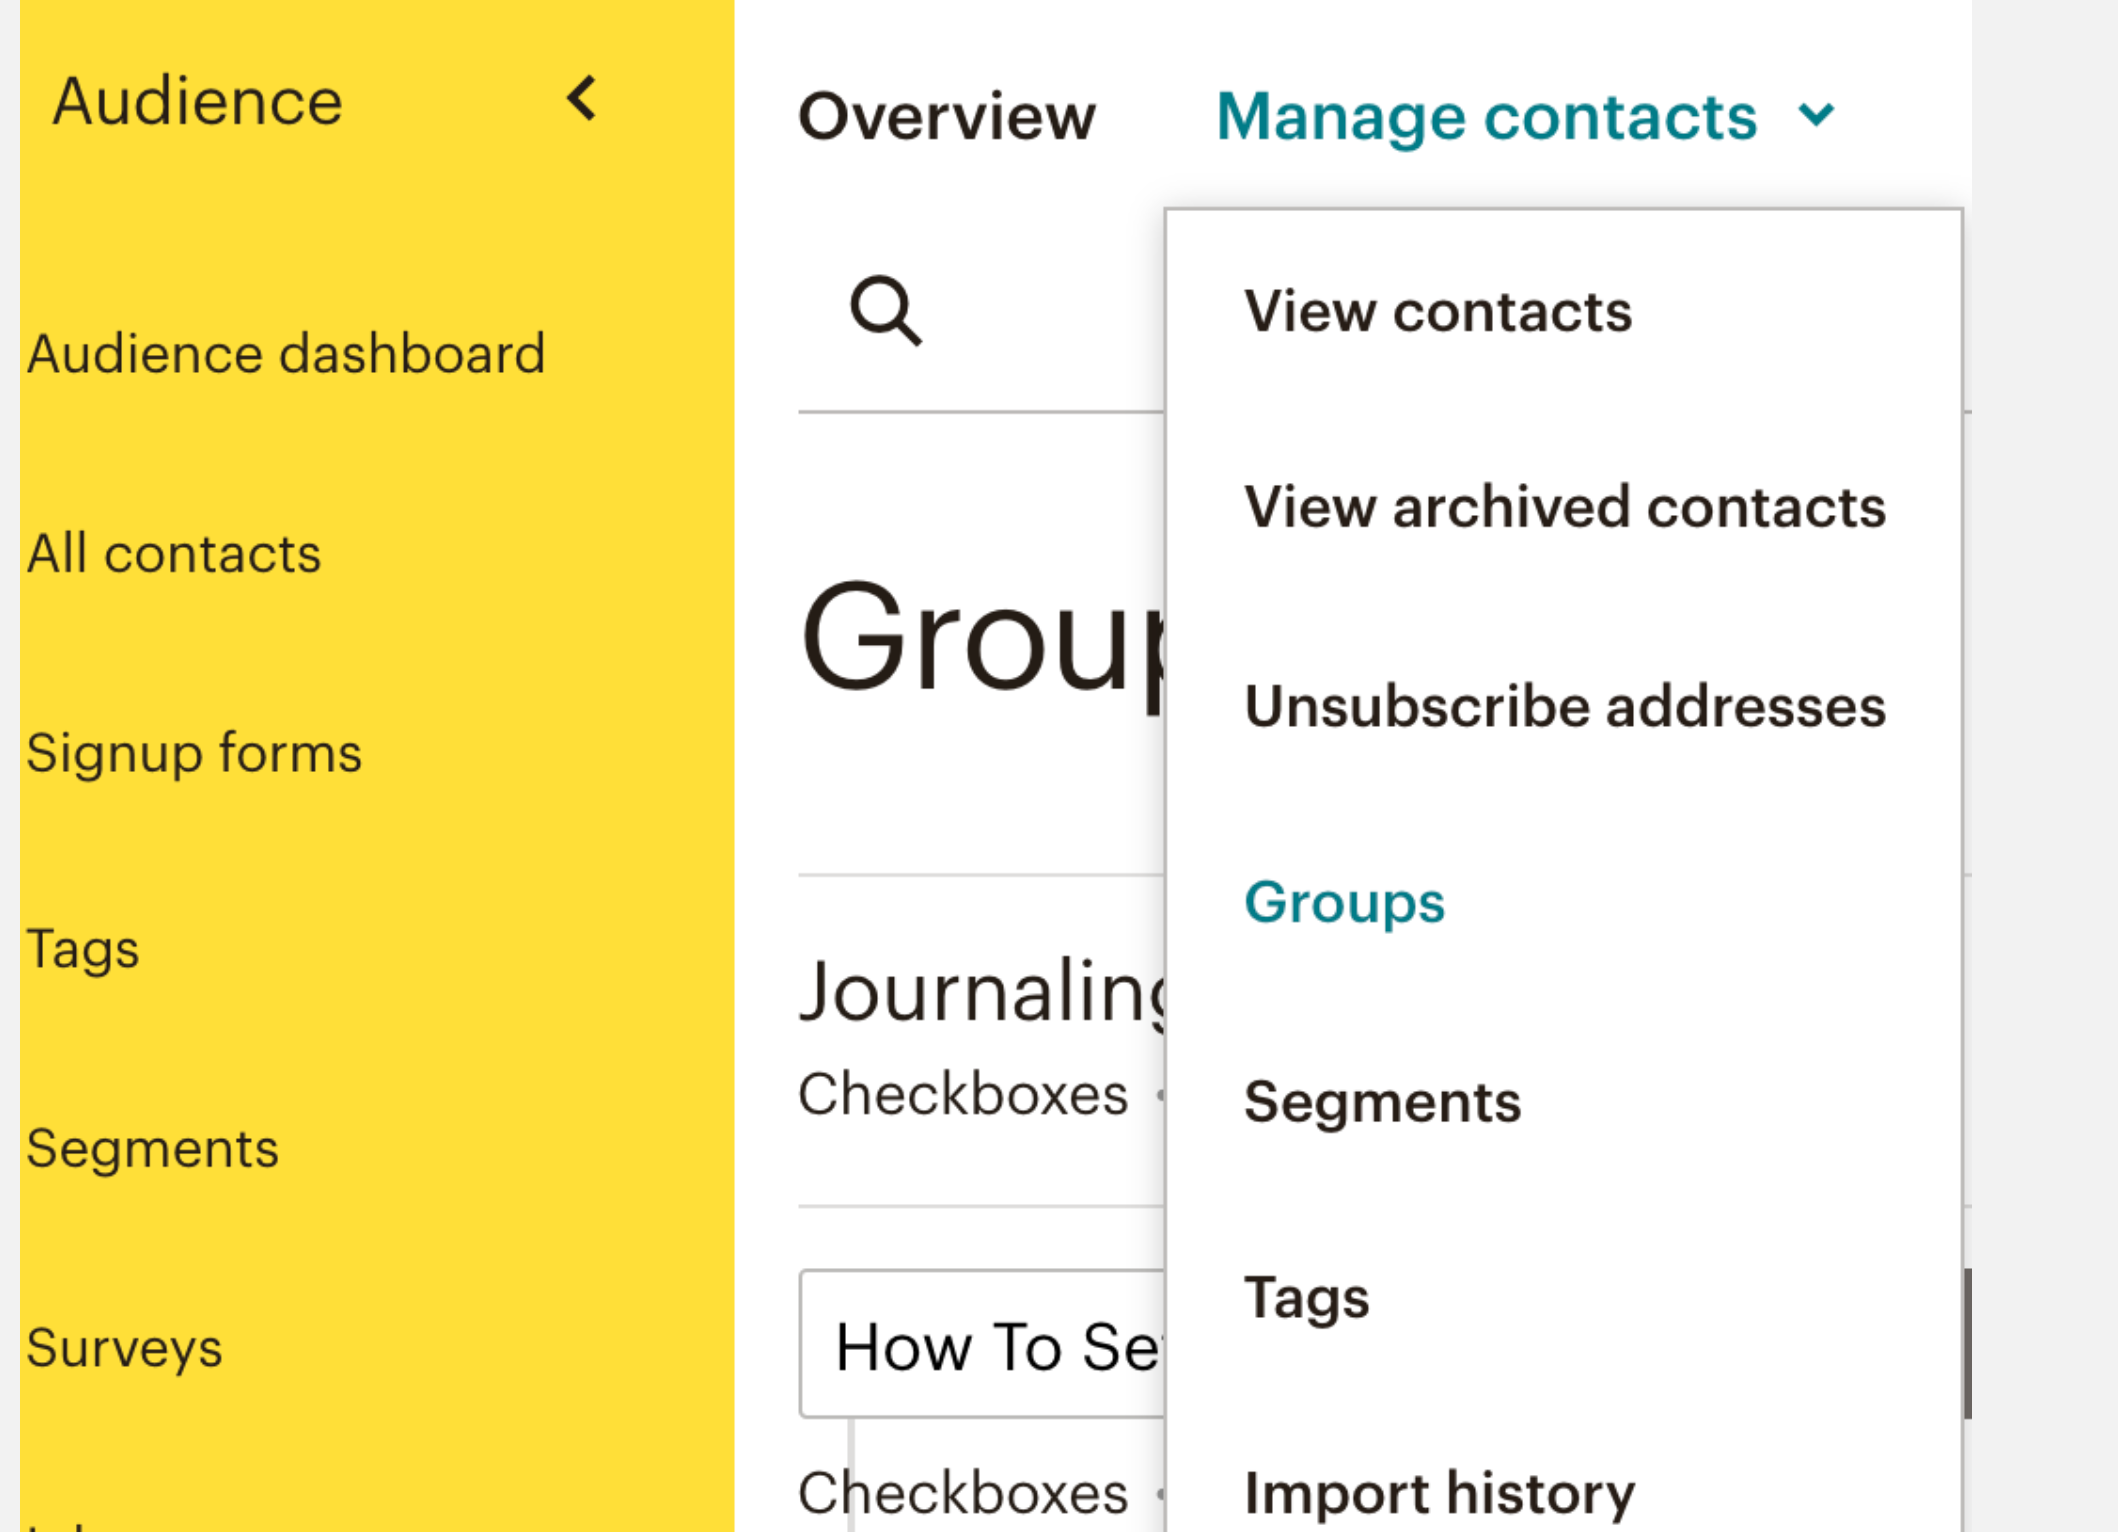
1) Create a GROUP CATEGORY for EACH Freebie you have. For example, create a Group Category called "How To Automate Your Coaching Workflow". You can find Groups in Audience -> Manage Contacts -> Groups
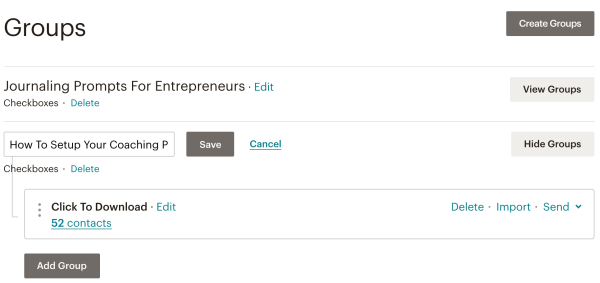
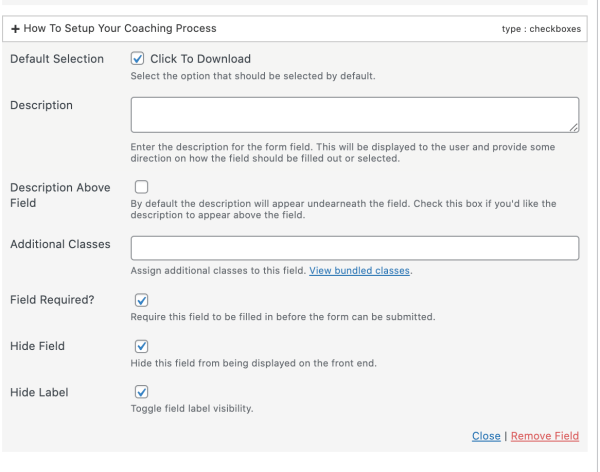
2) Create a GROUP within that category and just call it "Download" and set that to be represented as a checkbox (See above image). In Image 2 above, "How to set up your coaching p.." is the GROUP CATEGORY. You can ignore the other group category above, that one called "Journaling Prompts..." that is just another Freebie I have. When you click to expand your group category, you can use the "GROUP" space within your Group Category and call it "Download". I called mine "Click To Download". I know it's weird but follow along and hopefully, this will make more sense as we go :)
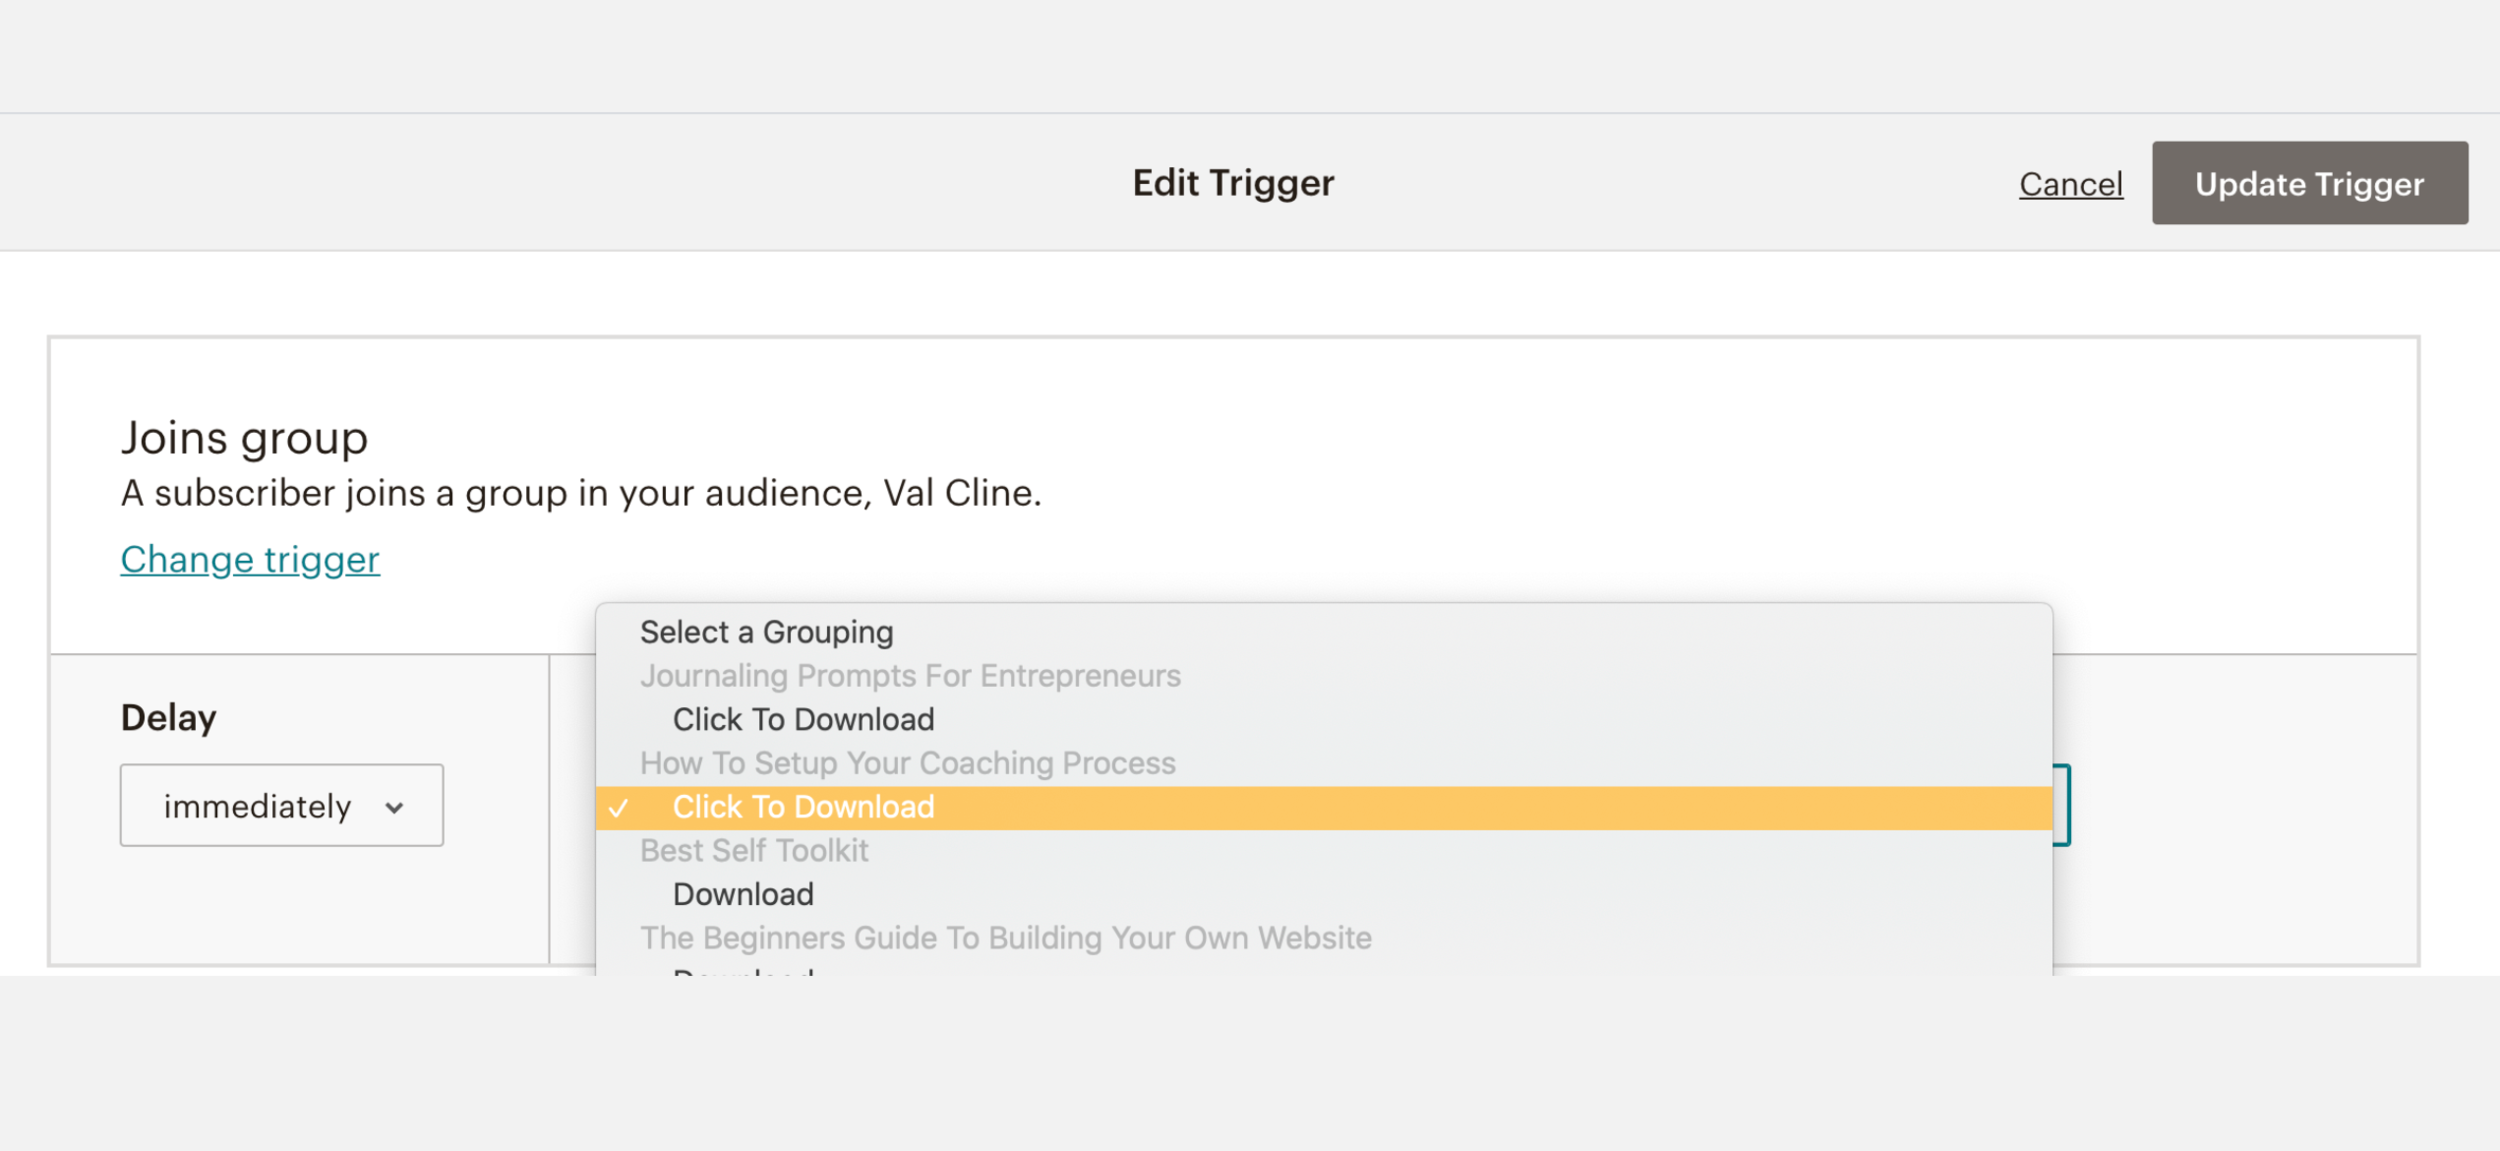
3) This is where you create the e-mail with the freebie download link within, that will deliver your freebie! Choose an automation trigger to send your freebie automatically. You will choose a trigger called "Joins group". This will send your freebie every time someone joins the Download "GROUP" within your Freebie "GROUP CATEGORY". In the following steps, you will create a form on your website, that already has your freebie selected in a hidden form field. When someone fills out that form, it will tell Mailchimp that someone joined your freebie group. Notice how I have many GROUP CATEGORIES named for each Freebie I have. Within each GROUP CATEGORY, I have created a group called "download".
What you have to do on your Website to create multiple freebies
For WordPress (Squarespace tutorial coming soon)
4) Use a free plugin called Easy Forms and set it up to link to your Mailchimp account. Install it. Connect it to your Mailchimp account, and it will find your lists, groups and all you need.
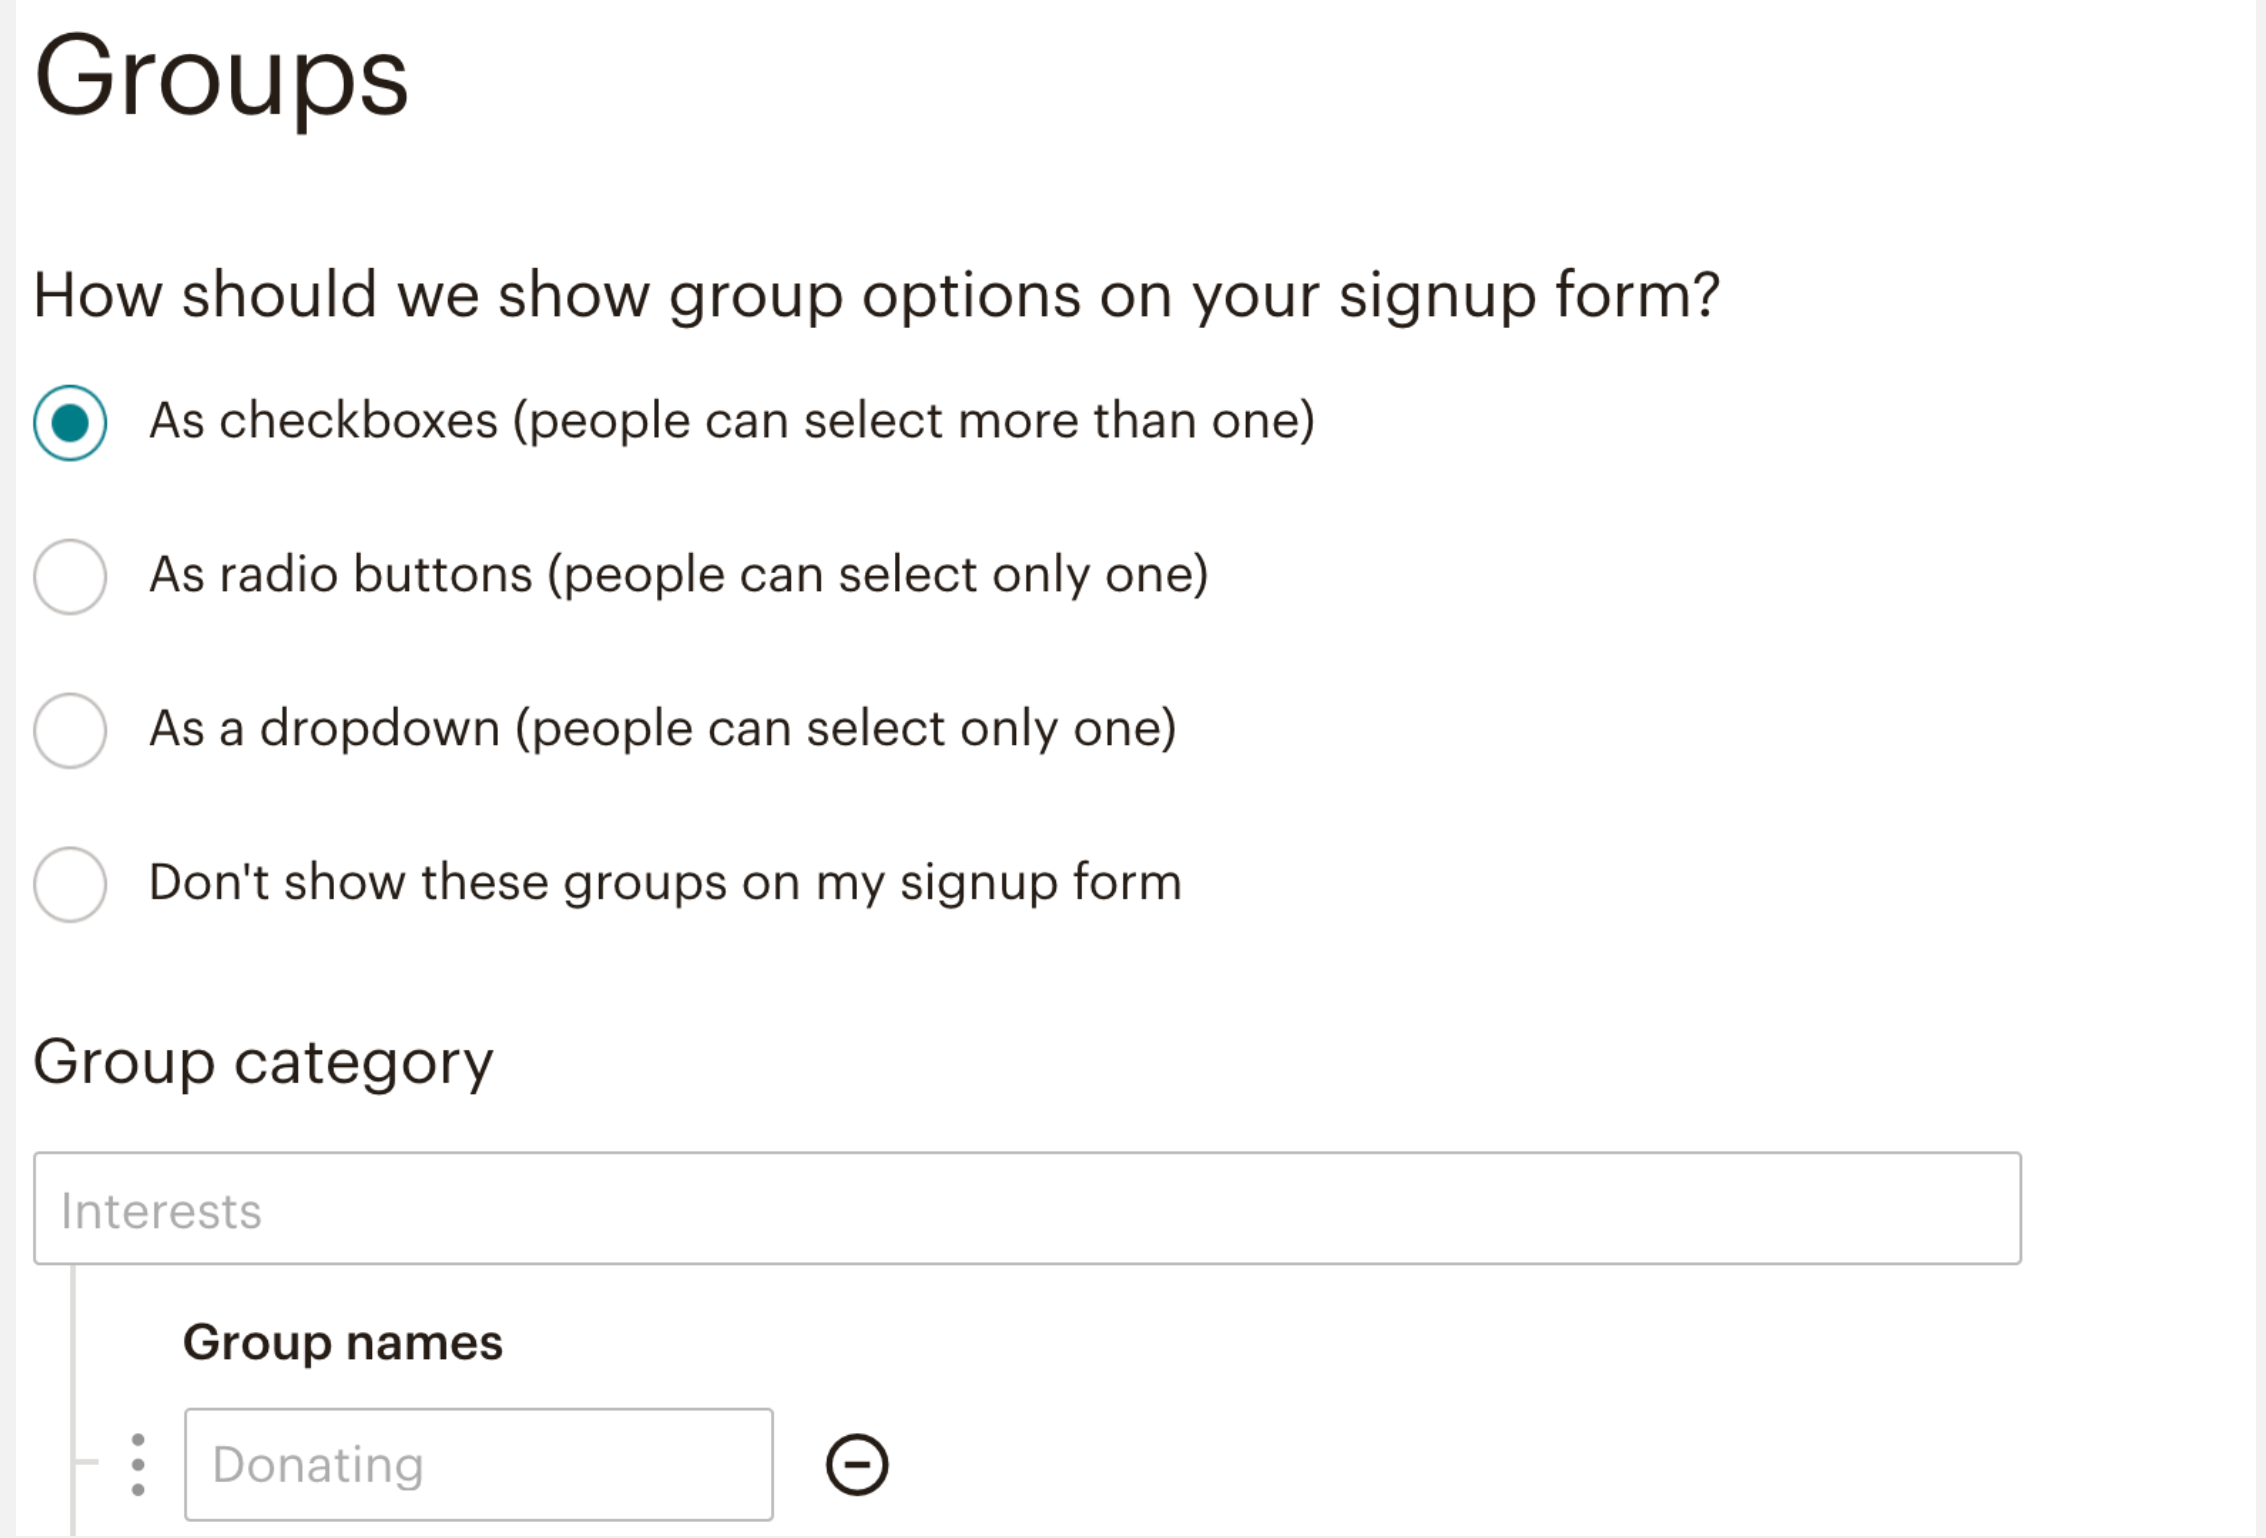
5) Create a form that connects to your freebie group (the download group in your freebie group category). Make sure your form has the checkbox for that group automatically "checked" and invisible. See image 5 above for more detail. Test your form to be sure your freebie delivers, make sure you've turned on your automation in Mailchimp.
I know this is a fairly basic tutorial, but my hope is that it gives enough info to help some of you make this happen. Good luck!
-Val
Please Note:
The post and video below are outdated, however, the concepts remain the same, and you may still find them useful for another way you can do this. Mailchimp has changed its user interface since I posted below and you may find the update above more helpful. Both may help you get where you want to go in the end :).
3-Steps To Send Multiple Freebies Using Just One List In MailChimp – For Free.
For all of you in the early stages of business, saving the moula is pretty important.
MailChimp has a lot to offer you for free, but I know many of you aren't quite sure how to get the most out of it so here's how I hope I can help. Many people believe that you must create a separate list for every email opt-in you create when using MailChimp, but this is not true.
Here's how most people create a freebie using MailChimp
Create a cool freebie like a helpful excel template!
Go into MailChimp and create a list for this freebie and call it Excel template freebie
Create a welcome email with the freebie download so anyone who joins that list gets the download with their welcome email
And this is totally okay! But once you have more than two or three freebies under your belt you soon find having so many lists a pain. It's not easy to email everyone on all your email lists when you send newsletters and it becomes more difficult to manage than it has to be. Fortunately, there is another way.
Input form fields in MailChimp
The internet is full of forms! We've all used them and likely your humble email opt-in form could be working a lot harder for you than it currently is if you're using MailChimp.
HTML Forms are made up of fields & buttons.
Form “fields” collect information like Email, Name, Address, Phone Number and “buttons” are responsible for confirming you entered in all the information requested and sending that info to your email system like MailChimp.
With MailChimp, you can already be on my list and download all my freebies and I don't have to create a new list for every freebie I offer.
Fields and buttons
Website forms are used to collect all kinds of information for us. We use them as Opt-In forms that collect names and email addresses, we see them in survey tools, they are used whenever we are asked for information online. They are little powerhouses! Your Opt-In Form can do more for you than you think.
In the example below, we have 2-fields and a button. Fields come in various flavours. Most of us use text fields.
Text fields are INPUT fields in forms and this just means that people can “input” information into them in a text format. Your name and email form fields collect text so they are text type input fields :)
Most freebie opt-in forms have 2-3 things max:
A Name
An Email
A way to submit the info (A Button)
Let's see how code looks for the example below:
This is the name field
<label for=”mce-name”>**this was left blank in the example below**</label>
<input type=”text” value=”Name” name=”name” id=”mce-name”>
This is the email field
<label for=”mce-name”>**this was left blank in the example below**</label>
<input type=”text” value=”Email Address” name=”email” id=”mce-email”>
Notice how there is nothing in the label space in this example. If this form had labels, you would see that info outside the form box. This form is using the form values as labels helping us know what info to put where. When we enter in our own Name and Email Address, our values will replace the default values put into the form code as placeholders.
This basic understanding of what your opt-in form input field code is doing will help you understand what I'm going to ask you to do next!
Step One: Create your freebie opt-in form in MailChimp
Follow these steps in MailChimp to create your form, and add a new text field.
→ Go to: Signup forms then Form Builder to create your new freebie form code
→ Create a new TEXT field: Add a filed -> then choose text
→ Field Label = OPTIN
→ Field Tag = OPTIN
→ Make that field VISIBLE (and change it later)
→ Default Merge Tag Value = Name-Of-Optin (I used “testfreebie” in my example below, this is where you put a name for each opt-in with no spaces)
Step Two: Grab the code MailChimp gives you & pop this into your website to edit it
→ This time head back to SignUp Forms and click EMBEDDED FORMS
→ Copy the code :)
→ Now paste this code into your website where you want your opt-in form
–FIND YOUR NEW TEXT FIELD IN THE CODE YOU PASTED INTO YOUR WEBSITE. IT SHOULD LOOK LIKE THIS–
<div>
<label for=”mce-OPTIN”>OPTIN</label>
<input type=”text” value=”” name=”OPTIN” id=”mce-OPTIN”>
</div>
–CHANGE IT TO THIS—
<div>
<label for=”mce-OPTIN”>***leave a space here***</label>
<input type=”hidden” value=”testfreebie” name=”OPTIN” id=”mce-OPTIN”>
</div>
→ Save this page as a draft until you have created your opt-in download email ;-)
Step Three: Create the automation in MailChimp that delivers your new freebie!
{Check-out the video below that shows you how this looks}
→ Go to Campaigns then click on Campaign over on the right
→ Choose Email then Automated
→ Then Subscriber Activity, Welcome New Subscribers
→ Name your campaign and then **choose your main email list** & click “begin”
→ Now click “Change Trigger” top left next screen
→ Then click on List Management
→ Click on “Changed list field to value” – then on the next screen under “settings” select the “Opt-In” field you created
→Still on the same page, In the “value changes to” box put the name you used for your freebie when you created your form (needs to be exactly the same, no spaces)
❤︎ And that's it! Do this once and you can repeat these 3-Steps easily.